HELP WITH HOME THEATER INSTALLATION LOS ANGELES

installation-home-theater

At Audio Video King everything revolves around sound and vision – we do not have vacuum cleaners, tumble driers or microwave ovens and with years of experience we are specialists in sound and vision! And you can use our knowledge.

You have a nice TV installation or audio set, but you still have problems with using it every time. Perhaps in the course of time, a digital TV decoder has been added, or you have changed the cable provider and the radio does not work anymore.

Or were you used to a stereo installation for years and now you have a Home Theater installation, then we can imagine that the operation is not what you’re used to. We are happy to help you get started again and will give you the right text and explanation in peace so that you can optimally enjoy the best picture and sound!

We are happy to help you with:

(re) connecting the existing TV installation / or audio set
setting up digital TV
explain the correct operation in peace
explain the remote controls
optimize the number of cables
solving technical problems
on your way to streaming your music
to hang up the television

Connecting your home theater system or soundbar: you need to know this

TV & Home Theater Installation

If there is one subject that is widely read and about which many questions are asked, it is the connection of equipment. What are the best ways to connect your home cinema set or soundbar? Which cables can you use best? And, how do you connect multiple devices to each other? In this blog, we will discuss the most important cables, connections and ways to connect your home theater system or soundbar.

Connect guidelines to home theater or soundbar
There are so many different devices for sale, from televisions and blu-ray players to audio video installation Los Angeles and set-top boxes. For this reason, it is impossible for each device and any combination of devices to put the correct connection method and the right cables together. Yet we can give you a general direction, with tips on the best cables, the easiest connections, and the most common combinations. If you still can not figure it out, ask your question in our question and answer section.

Before you start
Before you start connecting things, you probably already have a hundred questions about the type of cables, the order, and the operation. It is therefore wise to make a clear overview of the devices you want to connect and what connection options these devices have before you start. If you have mapped these connections you can also quickly and easily match them. Also look for one central point, also called a hub. This can be a TV, a home cinema set, a sound bar or a TV. This is the point where all (or most) components come together. Take, for example, a home cinema set with three HDMI inputs and one HDMI output. Connect your components (players, decoders, etc.) to those inputs and have the image sent to the TV via the HDMI output. One hub gives you an overview and also makes adjustments easier.

If you still purchase equipment, make sure you also make an overview of the connections you need. For example, if you have five devices that need to be connected via HDMI, buy a receiver, a home theater set or a TV installation with at least five inputs. This saves you a headache later about connecting your system. The same applies to other connections, such as RCA ports, optical and digital coaxial inputs and outputs.

Digital is preferred
The very first tip is actually quite simple; if something can be digitally connected, then connect it digitally. Digital is always preferred (unless you are a hi-fi enthusiast who hears the difference with analog) because it is less susceptible to interference and is also compatible with the latest audio formats. And when we talk about digital, HDMI always prefers optical (Toslink) and digital coaxial. The main reason for this is that HDMI transmits both image and sound, while optical and coaxial digital only transmit sound. In addition, HDMI offers a larger bandwidth, allowing the latest surround formats such as Dolby Atmos and DTS: X to be transmitted.

Everything depends of course on the devices you have and what connections you have on these devices, but if there are HDMI ports available, use them. If these are not there, first look at optical and digital coaxial output inputs. If these are not there or you can not match the sender and receiver, you will look at the known and analog tulip connections.

Receiver, soundbar or home cinema set as a hub
I have briefly mentioned above but always look for a hub, the central place where the components are connected. We always prefer a receiver, a home cinema set or a soundbar, provided that they have enough inputs to store all your components. Here, too, you first look at the digital possibilities, preferably HDMI. All components are connected to this. The home theater set, soundbar or receiver is then connected to the TV using one (HDMI) cable, while the soundbar, set or receiver simultaneously provides the audio output. On the receiver, soundbar or set you can then select the desired input so that the right image is displayed on the TV and the corresponding audio sounds over the speakers.

Can not you lose everything on the receiver, soundbar or home theater set? Then use the TV as a second hub. For example, connect a media box or console to the TV (preferably via HDMI but otherwise via a digital cable). If you have a TV and a receiver, sound bar or home cinema set with HDMI arc (about which more below), the audio of the connected device is automatically returned via the HDMI cable to the first hub (soundbar, receiver or set) So you have sound through the speakers of your system and image on your TV. Offer the TV and first hub not support HDMI arc, connect an audio cable directly to the TV to devices connected to the receiver or soundbar home theater set.

Sound TV channels over speakers
What many people often run into is the sound of the TV via the speakers of the receiver, the soundbar or the home cinema set. If you have connected everything as described above, via one central hub, you automatically get that sound over your speakers when the decoder or set-top box is switched on and you select the correct input on the hub. But, if you watch analog TV or have the decoder or set-top box connected directly to the TV, you only get the sound on TV. You can put an extra audio cable between the decoder, set-top box or TV, and the hub, but HDMI arc is the best solution.

HDMI arc (Audio Return Channel) is a function that requires both the TV and the receiver, soundbar or home theater set and makes it possible to return sound from the TV itself (its own tuner and its own content) via the HDMI cable. Also image and audio come through. In short, you do not have to lay extra cables. Read more about HDMI Audio Return Channel.

Pay attention; HDMI arc is a standard that can often cause problems and does not work the same on every device. If your sound from analog channels or sound from apps within the smart TV platform of your TV is not heard through HDMI arc, use an audio cable between the TV and the central hub. Here, too, applies again; digital is preferred.

Devices without HDMI
You may still have devices that do not have an HDMI port. So you can not use the central hub to receive audio and video so that the audio is then transmitted to the TV via the speakers and the image via the HDMI cable. If you want the audio of these devices to run over your speakers and the image via your TV, then it is best to connect the TV for the image and to put an audio cable to the hub for the sound. You can also choose to transfer audio and video to the TV and then send the audio via the TV to the hub via HDMI or a separate audio cable. If you want audio and video through the TV, use for example a SCART cable between the device and the TV.

If you have too few HDMI inputs on your home cinema set, soundbar or receiver, you will have to make choices. Which source do you view the most? Or, at which source is a high quality (surround) audio quality important? This source is then connected via HDMI. The other sources can be connected directly to your TV (for the image via HDMI of course). Then you go from the device with an audio cable to the hub or via the TV and HDMI arc or an audio cable to the hub.

Conclusion
Connecting equipment to your home theater system requires some preparation. So make clear for yourself which devices you have and which connections are available. There is, unfortunately, no set-up for an unambiguous conclusion, except that digital is (almost) always preferred and that you have to know in advance what you want and need. For the rest, your situation can deviate from what is ‘standard’ due to the choice of certain products, but with the above information, you can start at any rate. If you still can not figure it out, ask your question below or ask your question in our phone number 323-332-6781.

For the better cables, we refer you to our partner RU Connected.

Forward-looking installations to safety & comfort

TV & Home Theater Installation

As an audio video installation company, we can offer you a complete package of services in the field of electronics, home theater, projectors and security cameras installation. We have a lot of know-how and expertise concerning installations such as wall TV mount.

Home theater & TV

Do you like film and do you want the best possible quality in terms of image and sound? Or are you a music lover who sometimes gets goosebumps when listening to a super quality sound? Then you need not only a good installation but also an installer who knows his profession and knows perfectly which system is most suitable for your space and wishes.

With our extensive knowledge of home cinema and TV installations, Audio Video King in Los Angeles is your best partner for a quality result that you can enjoy for years.

Home cinema/home cinema

  • Complete home theater systems and cinema seats
  • Amplifiers for home cinema
  • DVD players and blue-ray
  • Decoders
  • Speakers for cinema in-house system (2.1, 5.1 or 7.1 speaker sets)
  • Video projectors and video screens
  • TVs

Music, hi-fi & audio systems

  • Amplifiers
  • Receivers
  • speakers tweeters and subwoofers
  • CD players
  • mp3 devices

Security & safety systems

  • Outdoor security cameras
  • Home security camera
  • HD Cameras
  • IP Cameras
  • Wireless Cameras

Feel free to contact us for personal advice regarding home theater, security or audio systems. We are happy to make an offer in response to your wishes and needs.

On the other pages, you will find information about all the services we offer: home theater, wall TV, projectors, security, audio video, and installation.

How to Install a Simplicity Wall Mount

Wall TV Mount Installation

Despite the name, Simplicity can mount wall mounts more complicated than most other brands, but the task is still manageable when doing it yourself. Simplicity TV wall mounts installation allow you to view your TV from different angles, make sure you always have the best seat in the house. Having a flat screen TV you can bump the style and save extra space by getting rid of the bulky entertainment center and assembling your TV on the wall.

Instructions:

  1. Find two studs using a stud finder. Mark the location of the studs with a pencil. Check the presence of a stud by hammering a nail into the wall just deep enough to feel the stud.
  2. Hold the holder on the wall and place the level on the top of the mountain to make sure it’s right. Align the holes of the mountain along the stud marks and mark their locations with a pencil.
  3. Drill the mount hole marks to a depth of 2 1/2 inches.
  4. Fasten the wall plate using the fastening bolts and washers, tighten the bolts with a wrench; not too tight them.
  5. Place the arm of the mount between the horizontal hooks along the wall plate and secure it with the bolts and washers.
  6. Place the clips in the monitor holders so that the “V” shape in each clip opens to the large holes. Make sure that the Allen screw is facing the open part of the bracket. Secure all four clamps into place using the 2-inch lock bolts and quarter notes. The clamps must rotate up and down.
  7. Thread a bolt into the insertion opening at the back of the television to determine how large bolt is required.
  8. Place the short bolt through the flat ring, the spacer cap, the monitor bracket, the corresponding spacer and into the TV.
  9. Place the center holder in the middle of the television and slide the two cross tubes through the holes in the side middle supports. When the tubes are in place, turn each clamp with an Allen key.
  10. Lift the TV instead of sliding the center bracket on the arm. You will hear a click when the lock tab clicks. Put the mountain by placing the small safety screw in the hole in the arm near the adjustment knobs.

Hints:

  • The Simplicity wall mount is designed to fit the 16-inch stud spacing, which is the standard building requirement in modern homes, according to the Old House Web.
  • Per the Simplicity TV installation DVD, “For safe wall TV installation, dry wall or other wall covering materials should not be larger than 5/8 inch or 16 mm.”
  • If you have an older house where the studs spaced are more than 16 inches, this mount will not work.

Installation of a home cinema system

home-theater-installationWhat do I have to pay attention to when installing a home cinema system? The question is often asked. We are already trying to get you started with a number of tips and points for attention.

1. The room
The room in which the home cinema system is installed is sometimes forgotten as a factor in the home theater installation. Different aspects of a room have influence.
Let us first consider the image quality of your television. Light sources play a role: both natural and artificial light. The natural light during the day we can try to keep out with the right choice of curtains, of the dark type. However, we need a little light in the room, if only to find the remote control or to sip the glass. The low-wattage lights are best aimed at a corner or on a wall to provide indirect light. A low beam is even better: dimming when the film starts.

The shape of space also plays a role, and this in the auditive field:

  • Rectangular space
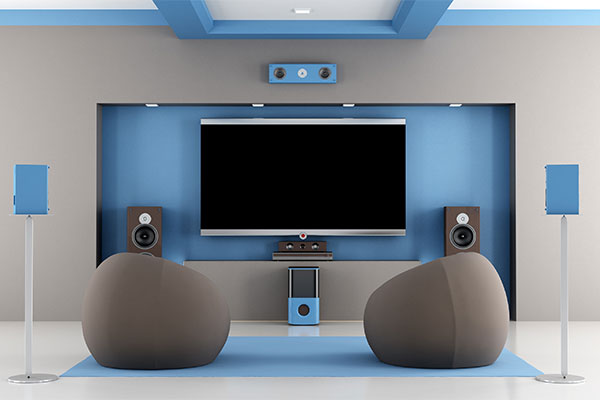
    This is the ideal shape for perfect placement of the speakers. Place the television against one of the short walls and your sofa in the middle of the room.
  • Square space
    Not so ideal. Unless this room is huge, the listening position will be pushed against the back wall by the shape of the room. Place the surround speakers against the back wall in the corners.
  • L-shape
    These spaces sometimes suffer from a strange bass sound. We advise you to think away the smaller space in the Land continue the installation as if it were a rectangular space.

The rear loudspeakers are best placed at an equal distance from the seat or sofa. They must also be placed slightly backward.

The included manual or built-in menu often gives you good visual support for placing the speakers. If you attach them to the wall or wall, you should aim them down a bit, towards the seat.
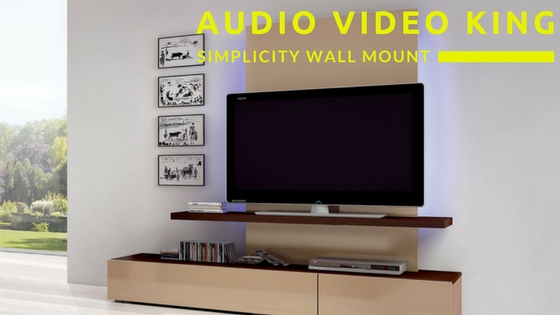
When you lay the cables, keep some cable left for the end. So you give the speakers some room to move when positioning. Do the same on the other side of the system. If your speakers are floor models, buy or make a support for the bottom. The center speaker gets a place on or under the television.

The last speaker you place is the subwoofer. This sound box provides the reproduction of the low tones such as explosions and other special effects. Here we can distinguish two types: passive and active. The latter needs its own power source, which means that this subwoofer has to be given a place close to an outlet.

Now that the wiring of the loudspeakers is ready, the fun part is coming: connecting the various devices. You can choose from different cables for which the quality differs considerably.

The cables that come with most speakers are of a lower quality and do not get the maximum out of your installation.

High-end AV cables are thicker (and more expensive) than normal cables but they have a much better response and less signal loss. They are especially recommended for slightly more expensive equipment.
Investing in a pair of decent cables often means a real transformation of your equipment and chain. It would be a shame to pay a lot of money for the devices and to come home with a thin cable that does not use all the possibilities of your installation.

With these more expensive cables, the length is also important. The longer the cable, the larger the price tag will be. Therefore measure the length of the different components that must be connected.

Most cables for home theater sets are colored: red for audio right, white for sound left and yellow for video. With all-in-one-box systems, the cables and the place where you have to plug them in have the same color. This should facilitate installation a lot.

The different cables in a row, in order of quality (best to less):
HDMI (digital HD audio and HD video)
This is a recent type of cable that connects the main unit of the home theater system to the television, in particular, an LCD TV or plasma TV. HDMI stands for High Definition Multimedia Interface.

The 19-pin connector has become the standard for Audio Video Installation equipment. As far as television, DVD players and game consoles are concerned, it has taken over the function of the start cable; in terms of sound, it replaces the optical or coaxial digital connections.

An HDMI cable transmits sound and video digitally between the various devices. As a result, in theory, the connection between the various components is much easier. Multichannel sound and high definition television can be transmitted over one HDMI cable. The condition is of course that your flat screen has an HDMI connection.

What’s more, with multiple HDMI inputs you can connect other devices at a later time, such as a game console. Those who only have one HDMI input on their flat screen can happily purchase a so-called switch box where you can connect all HDMI cables and connect them to that one HDMI input.

Different versions of HDMI
As with USB, there are different versions of HDMI. The version that is used almost standard today is HDMI version 1.3. This specification offers a number of improvements over the older versions such as a more accurate color rendering (over a billion colors), a large bandwidth (for the transmission of more colors and HD sound) and Auto Lip Sync, which makes image and sound synchronized through all devices.

HDMI will continue to develop, just like USB, but for now, you are comfortable with HDMI 1.3 in the coming years.

Scart (analog audio and video)
This cable handles both video signals (Composite, RGB, S-video and Component video) and audio signals.

Scart stands for Syndicat Français des Constructeurs d’Appareil’s Radio and Télévision.

Component video (analog HD video)
This is a professional type of connection that gives excellent picture quality and is not inferior to HDMI. The video information is divided into three separate signals, two for the colors, and one for luminance or brightness.

The cable consists of three cinch connections which are also referred to as Y (green indication), Pb (blue indication) and Pr red indication). Component Video is better than S-Video.

S-Video (analog video)
S-Video is the best connection when component video and HDMI are not available. The video signal is divided into two parts, one for colors and one for brightness.

This should result in better detail and higher resolution of the image. The sharpness of the images is better than composite video.

Composite Video (analog video)
With composite video, the signals for the brightness (luminance) and colors (chrominance) of the image are combined in one cable.

The quality of the image is less because they affect each other, and noise and interference can occur.

Optical digital (digital audio)
S / PDIF stands for Sony / Philips Digital InterFace and is a digital connection between various components to transfer audio. For example, you can connect the digital audio output from a DVD player or set-top box to an AV amplifier. From S / PDIF there is a coaxial version and an optical version.

The optical version, often called Toslink, uses pulses of red light to transmit audio. The coaxial variant uses copper wires.

RCA
This connector is known from the tulip plugs, with red for audio left, white for audio right and yellow for video.

What is a good brand security camera

LA-Security-Camera-Installation
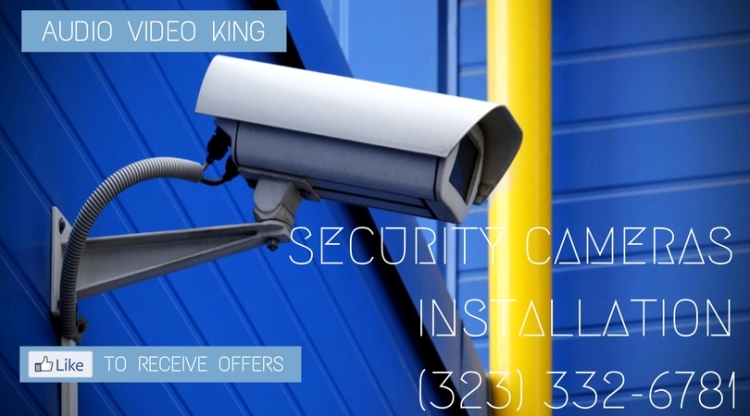
Surveillance camera brands It can be quite difficult to determine which brand security cameras is best suited for your project, house or assignment.
The prices are from a few dozen to thousands of dollars.

First of all, which popular brands are available at the moment?
– SST (a super brand from Taiwan for great prices and 5 years warranty)
– Samsung
– Sony
– Bosch
– Vivotek
– Dahua
– Hikvision
– Axis
– Panasonic
– Mobotix
– Milestone
– Netgear
– Videotec
– FLIR

SST CCTV brand
SST security camera systems are unique and reliable for an extremely low price.
SST is handmade in Taiwan, with also quality, SST systems are thoroughly tested 3 times before going to the customer.
We can say from experience that SST is a top brand that can compete well with the larger well-known brands, but with a lower price tag.
Do you have a project or a customer that does not want to spend too much money, but still wants to use an a-brand reliable camera system?
Then SST is a perfect alternative that you should have tested at least once.
We have been selling SST camera systems as the only dealer for 10 years, in 10 years we have seen many well-known popular brands, which within the warranty period of 2 to 3 years already broken, this is totally not the case with SST brand security cameras. We have customers who have been using our SST video systems for 10 years and are still working.

Dahua
If you have more money to spend, buy a Dahua brand camera system.
The possibilities are extensive and almost everything is possible, especially with the use of Dahua’s intelligent systems.
Buy the paid app from Dahua and receive REAL TIME ALARM if there is a movement, fantastic right?

Hikvision
One of the market leaders at the moment, with sublime image quality especially at night!

Installation
Audio Video King, Sight & Sound provides high-quality smart home solutions and affordable Security Cameras Installation services to customers across Los Angeles, California. Call us now for free quote: (323) 332-6781

You can hang up your TV and wall bracket in 4 steps

TV-wall-bracket

You have bought a wall bracket that lets you hang your TV tightly against the wall. But how do you proceed? To make it easy for you, I have put all the steps you need to take. Follow these instructions and your TV hangs on the wall like a picture frame in no time.

Collect the materials you need
Remove all materials from the box of your wall bracket. There is a chance that you will have parts at the end of the wall TV installation. This is because parts are often supplied for different sizes of TVs.

These items are not on the packaging, but you do need:
Phillips screwdriver
Flat screwdriver
Hammer
Ring spanner
Drilling machine or impact drill
Vacuum cleaner
Stone or wood drill in the size of the plugs of the wall bracket
Spirit level (if it is not near the wall bracket)
Pencil
Tape measure

Do you have a big TV that you can not wear alone? Then make sure there is someone in the room who can help you.

Step 1: Attach the frame of the wall bracket to the TV
Place the screen face down on a soft and stable surface. Use a cloth or cloth when you place the TV on the floor or on a table. Find the right bolts from the wall bracket packaging and attach the strips or interface plate to your television. Ensure that the strip or plate does not protrude above, below or beside the TV after installation.

Step 2: Determine and sign where you want to hang the TV
Draw the screw holes in the wall. For the ideal height, place the TV so that the eye level falls from your viewing position to two-thirds of the height of the screen. Because the TV is larger than the bracket, it can hang higher or lower after the confirmation you had in mind. A convenient way to determine the exact height is to place the bracket separately on the TV. Then measure the distance between the screw holes and the bottom of the TV. Mark this distance under the screw holes of the wall and you know exactly where your TV is hanging on the wall.

Step 3: Attach the suspension system to the wall
With the supplied screws and a screwdriver, you fix the wall bracket to the wall. With some systems, you have room to move the wall bracket slightly after mounting. This allows you to hang it perfectly, even if you have not drilled the holes properly. Use your spirit level to hang the bracket straight.

Step 4: Hang the TV with the frame on the suspension system
Pick up the television and bring it to the wall. Depending on the mounting system, attach the TV to the wall bracket.

Do you have a wall bracket with strips? Then hang the television with the strips in the bracket. With some systems, you hear a click as soon as the television hangs.
You can fasten a wall bracket with a swivel arm by screwing the TV with an adapter to the attached arm.

Do you have a bracket where you have to tighten bolts after assembly? Then place the spirit level on the TV, hang the screen straight and tighten the bolts.

DO YOU HAVE ANY QUESTIONS?
Our Audio Video King customer service is available 7 days a week or call 323-332-6781.

New Powerful Subwoofers Installation

polk-home-theaterPolk Audio has added two new top products to the Home Theater series, namely the subwoofers HTS10 and HTS12. These 10 and 12-inch long-throw subwoofers feature Polk’s patented Power Port technology and add powerful and deep bass to any home theater installation.

The Polk Audio HTS subwoofers are equipped with a dynamic Dynamic Balance 10 inch (HTS10) and a 12 inch (HTS12) driver, patented Power Port technology and an advanced 200 W versus a 400 W Class D amplifier. The result is an overwhelming bass effect that makes films and music even more alive.

The unique thing about both subwoofers is the fact that they are the only subwoofers with this Power Port technology. Polk Audio chose this technology to give the models a lower and more accurate bass sound. The Power Port technology ensures that the air flow from the loudspeaker is sent smoothly to the listener, with a deep bass and minimal distortion.

Michael Greco, Global Brand Director of Polk Audio confirms the choice for Polk’s PowerPort technology, reducing port noise, but maintaining the depth and clarity of the sound.

Both the HTS10 and HTS12 have optimized drivers. They are also compatible with home theater equipment and are equipped with connectivity via LFE or component inputs. As a result, the subwoofers connect perfectly to any home theater system. A simple control panel for volume control and a 12v trigger for switching on and off are also available.

And finally the appearance of the HTS10 and HTS12. They are built with a strong and acoustic housing. In addition, the MF construction with extra reinforcement ensures a lifelike sound.

Where to Place Home IP Security Cameras

ip camerainstallationYou can increase safety in and around your home or business by placing an IP camera. This type of camera is connected to the computer network of the home or company, so you can easily view the images on different devices. In this article, you will learn more about the possibilities and prices of IP cameras.

What is an IP Camera?
An IP camera (IP stands for internet protocol) is a form of camera security that is connected to the computer network. For the connection, you can opt for a network cable, but nowadays it is much easier to choose a wireless connection to the network (wifi IP camera), although of course there is always a power supply needed. A wireless IP camera can be connected quickly and you can easily view the images on your computer, smartphone or tablet. You can save the images on a computer or an external hard disk with the internet connection. You can also add other functions. For example, you can configure that you get a notification when movement is detected. That way you can react quickly if someone tries to break into it.

Can I install an IP camera outside?
It is certainly possible to place an IP camera outside. To guarantee the quality of the images it is necessary to maintain the camera well. That is why you should clean the lens (or the case in the case of a dome model) regularly. This can be done simply with a damp cloth or specially designed cleaning wipes. Also, make sure that there are no cobwebs hanging in front of the lens. You also check regularly that there is no damage to the cabling. Read more about – How to Install Security Cameras Installation.

Performances
There are two camera types that are very popular:

1) The bullet camera is actually the classic camera model. You can place a bullet IP camera outside or inside. This type of camera is fairly large and striking and is usually attached to a wall or post. Installation is not difficult and with rotating cameras, it is easy to set the direction of rotation to ensure optimal camera surveillance. Usually, a bullet camera is equipped with an infrared function so that it can also produce qualitative images in dark conditions. A disadvantage of bullet cameras is that they can be sabotaged quite easily if they are hanging at low altitudes. In many cases, they are also less aesthetic than the dome cameras.

2) A dome camera is less noticeable than a bullet camera. These domed cameras with glass or plastic casings are usually attached to the ceiling or a wall, but with the help of a bracket, they can also be mounted on posts. Due to the robustness of this camera type, it is very suitable for camera surveillance outside. Another advantage is that it is difficult to see the lens. This makes it difficult for burglars to know whether they are being filmed or not. In terms of types of dome cameras, there are many options. There are models with a fixed film direction, but there are also versions with rotating lenses, movement sensors, night vision and zoom function.

Buy IP camera
If you want to buy an IP camera, you have a choice of many types and qualities. For a basic model of an IP camera, you can expect a price of about $100 although the price for cheap models can sometimes be lower. This is the price for the camera itself, a whole set with 1 camera, a recorder, and any accessories can easily cost $500 or more. Prices can of course increase if you opt for a camera with higher image quality, motion sensors, large direction, …

Keep in mind that placing a camera surveillance system has extra costs.

Do you want an IP camera system installed in your home or business by a professional? Via the quotation service, you can request customized and free-of-charge customized prices from professionals. That way you can easily compare prices. Click here to go to the quotation page.

HOW TO INSTALL A TV?

Organize.

Television has become an integral part of our interior. It is placed in the bedroom, in the living room, in the kitchen, and sometimes even in the bathroom. It is important that the TV installation has to successfully fit into the interior. And more importantly to install properly.

You need this: TV, Fasteners, Assistants, Accuracy

Installing your TV: The easiest and most well-known way is to place the TV on a special stand. It can be a wall in the living room or rack, which is equipped with openings for TV and shelves for related equipment. The second option is easy to install – place the TV in the recorder mode.

The installation of the TV with mounting brackets requires more time and effort, but this form of setup has its advantages. The TV can be hung on the wall in the neighborhood, saving the room significantly. Also, a number of hooks you can vary with the angle of the TV. The TV installation can be mounted even on the ceiling, on movable hooks, and then it is possible to make a radical change in the angle and rotation of the TV.

The method of fixing the TV: Installing the TV close to the wall means easy installation, low-cost materials. Fits the most simple and inexpensive brackets. The TV installation on each surface, on the bottom of the wall, and the installation can only take one person. It is important to have a comfortable angle and to hang the TV at the height of 80 to 90 cm.
Installation of the TV with tilt differs only in the form of the luminaire. You should use the parenthesis that the position of the TV is not only parallel to the wall but with a slight slope. This method is easy to use and convenient for in the kitchen while placing the TV above the refrigerator and in the cases where the TV is placed, close to the ceiling. However, the TV series, so that protrudes from the wall, rather than on a simple bracket.

Rotatable and tilting installation method TV requires careful preparation. First, to move the TV requires more space, and therefore it will be at a greater distance from the wall TV installation. Second, when mounting heavy models with a large size will provide additional reinforcement of the wall, if it affects a large force, which means it can hold the handle of the fastener. However, this installation extends from the area where you can use the TV, it is particularly suitable for the kitchen-dining room. Then you can cook, watch TV, and then enjoy a dinner without interrupting your favorite program.
Read details.

Installing the TV on the ceiling. It is, therefore, necessary to use the brackets for the rotation of the lower corner and tilt angle. These brackets allow you to tilt the height of the screen and even rotate 180 or 360 degrees. It is a fairly expensive option to install, so it is rarely found in the homes.

On the television: To install the TV, you should consider the optimal distance between the screen and the viewer. It should not be less than the sum of 3-5 measurements of the width of the screen. Check the distance and the other method. Place the brush arm in front of his face to move backward until the hand does not obscure the screen. This place is optimal for the location of the sofa or chair. Optimal positioning of the TV at eye level, that is, the middle should be at a distance of 1 meter from the floor. The main thing – not to approach the TV: if you like the pixels of the image, then you are too close.

Mounting the TELEVISION on the wall is the easiest and most common type of installation. It not only saves space, but eliminates the need to monitor or watch the kids watching TV, or I will not, TV favorite cat. Pleasant view!